
Frozen Section Essentials for OPOs

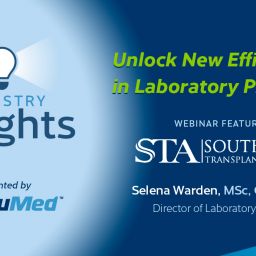
On-Demand Webinar with Expert Transplant Lead Pathologist Assistant Fernando Chang IMG

Is it possible for you, as an OPO, to setup a lab and produce quality donor-organ frozen sections? Absolutely!

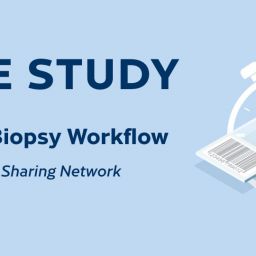
By assembling and utilizing essential pathology tools and methodologies, OPOs can achieve a streamlined and effective biopsy process for preparing high-quality frozen slides, crucial for timely diagnostic procedures and accurate interpretations.

WHO IS THIS FOR?

  • Donor & Transplant Professionals
  • Donor Center Lab Technicians
00:00:00:00 – 00:00:05:13 Laura Carroll we’re really excited to have Fernando Chang joining us today. 00:00:05:15 – 00:00:32:08 Some of you in the OPO community that we work with have already either knew him before he started working with CompuMed or have worked with him now that he’s been consulting with us. He brings a wealth of knowledge. He’s the lead pathologist, assistant at the University Hospital in Rutgers Medical School. He’s an expert in lab setup in the operational aspects and donor organ frozen technique. 00:00:32:08 – 00:00:58:12 And today he’s going to share some of that with you and hopefully provide some insight on what is available and then eventually how compliment can help you with that. So with that, Fernando, welcome and yours. Well, thank you very much, Laura. And I just want to thank you. The entire team of compliment for allowing me to present this important topic. 00:00:58:14 – 00:01:41:11 Fernando Chang IMG This is what I make a point that I work for. University Hospital in New York, and a Rutgers medical school is at the present residency program, which holds the residency program. Okay. But first, I would like to, if I can, dedicate this presentation to Dr. Stephen Peters. Back in 2009, I was in front of him on a job interview and it was already 30 minutes of this interview and actually it was playing the guitar. 00:01:41:11 – 00:02:10:11 He always had a bass guitar with him and I was playing chords that we were talking the first 15 minutes about fishing lures and stuff like that. And I was I just say they’ll do respect. Peter So would you like to know about my expertise back in my old country? I’m a physician surgeon, and I was thinking when this interview about the technical aspects of the job are going to come in, and Dr. Peters said to me, I know your work. 00:02:10:13 – 00:02:45:04 I really take what’s your work, but I really need to know if I can work with you. I need a person that I can work with. And I just went out and dedicate this presentation to Dr. Steven Peters husband, father, professor, mentor and friend, and that unfortunately, you know, the part that just recently from us and is relevant to talk about Dr. receiving Peter’s today as well because he is he was an inventor. 00:02:45:07 – 00:03:14:24 He invented many ways of doing frozen section and he studied frozen sections Keep obviously it’s a book about frozen sections as well and the founder of pathology innovations. And that’s what is extremely relevant to think about that the Peter’s not only from this emotional part of myself as a he was my mentor and learning about many things that are almost 15 years with with him until he retired, but also because it comes to a huge question for OPOs. 00:03:15:01 – 00:04:10:01 And if this technique about frozen sections and the setup of a lab is really a doable possible, it’s feasible in the OPO setting. And the question to answer for this question, it’s absolutely. It’s perfectly doable. And by assembling base and then group of essential tools and certain methodologies that we learned through many years of experience, the OPOs can achieve this and can perform this process of preparing high quality frozen sections, and that are extremely crucial when the selection of organ that organ transplantation comes and secure a diagnosis for the potential people or the recipients in this case. 00:04:10:03 – 00:04:38:11 So we have a we set some really humble objectives and this webinar, but extremely important as well. The first one is in this setting of the OPO and what kind of lab equipment is the basic lab equipment that an OPO needs in order to perform this procedure? We’re going to talk about the physical aspects a little bit, and we’re going to talk about the tools as well. 00:04:38:13 – 00:05:08:06 And I hope that’s this is going to enlighten everybody in the whole community to be curious about how we can set up this lab for frozen sections. And we’re going to go into the next topic, which is going to be organ and donor organ frozen section techniques. And this is really a big, huge topic. 00:05:08:06 – 00:05:39:04 Is hundreds of publications about frozen section techniques. It’s Dr. Peter devoted most of his life and teaching frozen section techniques through dozens of residents and this 14 years where we work together and it’s really a lot of technique and many things, but at the same time, and this process is extremely simple and we’re going to go we’re going to see why and how, and then we’re going to end this objective. 00:05:39:06 – 00:06:11:00 What are the objectives of this webinar? I’ll talk about a little bit about troubleshooting and problem solving. Why is this important? Because when we actually isolate what is wrong in this frozen section, let’s say let’s just pick the frozen section, freezing artifact, and we can identify why this is happening. There are ways to mitigate that in ways that are going to allow to find exactly which part of this process we can improve and we can do better. 00:06:11:02 – 00:06:34:21 And when we’re not covering this webinar is basically the facility requirements codes, for instance, construction code. This will be not there. The need for this. Then the spirit of this webinar and the regulatory compliance, I think we can talk about a little bit, but we’re not going to do it in there because this is a huge topic about that as well. 00:06:34:23 – 00:07:06:18 So we start the presentation talking about the lab equipment, the facility set up. This is the physical, the space and obviously we’re dealing with certain chemicals, volatile substances and then with we need good ventilation in the event we are working with Xylene for instance, there are certain types of hoods that are xylene approved and filters that are Xylene approved, and then we can use this type of filters. 00:07:06:18 – 00:07:31:10 For instance, there are all these that are related to formalin, for example. And as and, and also even if you use in Xylene substitutes like many labs nowadays are using it that are a little more expensive or a bit expensive than using Xylene and they offer less harmful qualities or properties, but it’s still these fumes need to be controlled. 00:07:31:12 – 00:07:57:00 Then we go to basic illumination in order to perform this job, we need to have good lighting. We need to have a place also to wash the equipment. And also we need if we use tap water, distilled water for the solutions, we still need a sink there. And it’s very important to have. Then we have basic things like proper disposal of biohazard material. 00:07:57:02 – 00:08:22:04 There are regulations in place where these OSHA dictates the many ways of dispose the biohazard potentially contaminated tissue is coming to an OPO lab in the form of fresh tissue. So contaminants are potentially present cleaning and disinfecting agents. And there are multiple them. But when we are talking about equipment that is working -23 degrees, the presence of water obviously is not needed. 00:08:22:04 – 00:08:49:24 And then we’re going to look for certain disinfectant cleaning agents that can be biocidal bactericidal or tuberculocidal that also meet the requirement to clean this equipment without leaving water behind and, you know, creating crystals and it is definitely not ideal for this type of equipment. And then at the end, we have the supplies. The supplies will be the consumables, consumables. 00:08:49:24 – 00:09:13:06 And it comes in general and many ways and examples are blades. For instance, the blades that we we all advocate use one blade per patient at the cost of $0.75 approximately to $1. It doesn’t make any sense to have these surgeries that cost thousands of dollars and not the change of life for every patient as well. There is a safe procedure for the operator, 00:09:13:06 – 00:09:39:24 the cryotomist. And in the unfortunate event that this person of a an accident with a blade, we know perfectly how we can trace the patient. And that’s why it’s important to change blades and something that appears always advocate about that in the community estimation. It. And so now we’re going to go into what is the basic lab equipment. 00:09:40:01 – 00:10:08:06 So the center of this lab equipment is definitely the cryostat. The cryostat is a machine that allowed us to cut a lower temperatures sections, fine sections, in this case sections that go in microns a thousand per by millimeter. And there are many options in the market like cryostats are well known are in many, many places, in many hospitals like this CM1850, CM1860. 00:10:08:06 – 00:10:35:22 That comes with different advantages to the 1950. There are, you know, pretty, use in and in many places around then most, you know, on newer equipment are the Avantik QS12 and the one in the picture is the Epredia. And many of these equipments have different advantages and many features that make it possible for your lab be more attractive. 00:10:35:22 – 00:11:12:13 Also are variations in price. Some of them have U.V. light, which is excellent as it as a disinfecting agent using the ultra violet light. There are other ones that are like self-cleaning vacuum and systems as well. Remember this again, we going back to the concept that we are working with potentially infected samples and cleaning these samples, We need to be very careful not to aerosolize these in very thin sections that contain tissue as well. 00:11:12:15 – 00:11:39:21 There are of other things, for instance, like the 3D that we see in the picture. Some of them are adjustable. So you can adjust the, you know, how high is the equipment so you don’t need to bend much. And it goes for the operator. The cryotomist, you know, depending on the size of the person. Let’s see, we’re going to talk about our computers screen rating system in and proximal. 00:11:39:21 – 00:12:03:17 Then we see to the right to be Stainer is a linear Stainer is an automatic stainer. As you can see, there are multiple of receptacles stations, I will say, where we have the chemicals from left to right. In this case, this is starting on the left and in the staging area is to the right, is very good because this is standardized. 00:12:03:17 – 00:12:30:14 The time we have time for every station. For instance, in some places in my place, we use one minute for hematoxylin and 30 seconds for Eosin, for instance. And every we can set up the time for every station depending on the preference. But we’re going to talk about that, how we can actually the intention of make this unit from this whole process of cutting frozens, it will help the community as well. 00:12:30:16 – 00:13:14:02 Then we have a basic cutting board and then some lab equipment that we’re going to have around and the basic lab set up. Okay. So we’re going to have some more questions, which is going to continue afterwards. So this is a slide that is going to help us more or less to understand or to kind of go from this big context. 00:13:14:05 – 00:13:48:01 How is this technical process happening and the biopsy process itself, obtaining the biopsy, we’re not going to entertain too much because this is for the surgical center. But we’re going we are definitely focused on the creating this slide and then how we can how actually once we have the slide, how we have the slide and digitize this slide, how to create a digital image of this slide and this whole technical process is going to present our pathologists. 00:13:48:01 – 00:14:22:00 And in this case, this will be the professional service of this entire biopsy process. And then we’ll read it for ready for reading, creating the slide just like we have I divided this and embedding sectioning and staining and every single of this is steps. It will give us a challenge of how to do it. And the technique we can use it will make the difference between the result of the slide and then the quality of this slide they’re going to depend on. 00:14:22:02 – 00:14:55:21 Like we’re going to see the later on again, let’s see the next one. And we’re going to talk about a little bit of a the flat embedding system in this case. It will go back will be the embedding part. And I’m just going to go in this picture and going to begin to show you how in this text to the right, what is this alternative system? 00:14:55:21 – 00:15:22:05 This is the old way how we used to embed issue using this chucks. And you can see how the tissue is in different levels and different angles. Even the one in the right is kind of pumping out. And if we cut the section, chances are that this tissue might pop out from the Chuck. Obviously, this is not ideal. 00:15:22:05 – 00:15:48:20 If we have a core biopsy, it will go to waste. So that’s why Dr. Peters invented this system. And you can see that Chuck into the left and this is perfectly flat now you can see spaces into the into the surrounding the tissue, but we use a technique called plastering that also is part of the training and that will hold the tissue in a perfectly flat plane. 00:15:48:22 – 00:16:19:07 And when the tissue meets the blade, it will make the tissue evenly, it will meet the blade evenly, and we will control how much sample we going to trim or efface in this case. So we’re going back to the cryoembedding system. And we get this point because of that, because that embedding of the samples never guarantee a sample, especially a small biopsy, to be on the surface. 00:16:19:12 – 00:16:47:06 Sometimes it was too deep into the OCT and the media that we use to hold the tissue. And some things were too superficial, or maybe in an angle in that prevent it to have a one entire length of this. The tissue, Once the tissue was actually stained in the end, we were having parts and fragments of tissue. And that’s the reason why properly flat is extremely important. 00:16:47:08 – 00:17:25:09 This actually helps us also to facilitate how deep into the block we’re going to go into the technique of effacing or presenting the tissue at the level of obtaining sections. Is something that it need to go to level that we are not too deep, but we’re not too superficial as well. If we are too superficial, maybe we’re going to have sections of the tissue intermittent sections, and if we are too deep into tissue, maybe we are going to have additional levels and we’re going to exhaust the entire tissue wasting the sample. 00:17:25:11 – 00:17:55:19 There is a sample preparation that that might be addressing, and I use the quotation mark because really at this point when I have the slide with the cutting table, in the case of kidney biopsies, kidney biopsies, especially wedges sometimes come with a little piece of perirenal fat in a fatty tissue, which is not conductive. It doesn’t conduct, doesn’t transfer or this is it is not conducting at all, then it conductive of temperature. 00:17:55:21 – 00:18:29:24 So then at -23, we won’t be able to cut fatty tissue. Two if we put in place the fat in front of the bleep, it would actually will continue give us problems. And that’s why especially for kidney biopsies, for wedge biopsies, we need to trim a little with the tissue and then proceed to embed. Then we have the liver wedge biopsies that also the because of the water content of the kidney perhaps offers a little more challenges. 00:18:30:01 – 00:18:56:03 And in the case of the liver wedge would be bit the challenge is not the same. Now the cryoembedding system of Dr. Peters have so many parts to be honest, that it was not probably the spirit of the this presentation dispensing slides, brushes and many other things, but the basic idea to understand how the tissue goes flat is just looking at the well bar. 00:18:56:05 – 00:19:17:13 You see this compartment is this. In this case of the 24 millimeter, they have the 18 to 24 and a 30 millimeter, depending on the size, I believe for our purposes, we can use perfectly to the 24 millimeter well bar. And when you dispense the tissue in each receptical. You can see that the tissue is going to go flat. 00:19:17:15 – 00:19:48:01 And the time you put the OCT is going to freeze in a perfectly contained area, then be chuck with this cuboidal part and they have a fix and secures the OCT. So even though you apply a little force, it’s not going to chunk out of that. And finally, because the difference of temperature, we need to extract heat from the tissue that is at room temperature in the OCT as well. 00:19:48:07 – 00:20:25:17 And we have this freezing block that is going to be like a heat extractor, basically, and it’s going to strike the heat from the sample accelerate the process of freezing tissue. Then we go back. We already very look at this. Now I have a sample of video of sectioning and I’m going to stop the video on the set and let me stop the video right here. 00:20:25:19 – 00:21:01:03 And you see the shattering on top. That’s a perfect example of shatter because that part of the tissue was very cold. And when the blade meets something different, it is a different hardness of the block then the blade and that level is start jumping on top of the OCT and this gives you that shatter pattern. Then I proceed to warm up the block and you see how the section is coming out, those little holes where before. 00:21:01:03 – 00:21:40:03 But you can see how even the section is coming at the end is going to be a little thin part. I know you can see that too as well. But yeah, and then you can see how even this section is coming with a shutter. And since everything about controlling the temperature of the chunk and there are so many other things as well, is the like we get, we need to listen also listen to the chuck crunchy biopsies. 00:21:40:03 – 00:22:08:15 You can see you’re going to hear the blocker and the blade meaning the block and it’s going to be a sound. The spatial characteristic sound is going to tell you immediately this is to cold, don’t continue. Then don’t even continue effacing the block, you need to warm up the block a staining. So it is staining hematoxylin Eosin is being used since forever in the 1800s. 00:22:08:17 – 00:22:39:20 Hematoxylin is an organic , naturally occurring dye discovered back in the 1500s. Imagine that. Eosin was added to that and this is the gold standard for a staining. For instance if we use different compound in this case xylene or simply xylene. Remember we had to use a hood no matter what. It’s always important to control the fumes. 00:22:39:22 – 00:23:03:17 And if we can scale we have the like a C for 20. That’s a linear staining, automatic staining. And we can see this. I work in this of media that I took and you can see how it goes from one station to the other one. And depending on the time in this case, there will be three hematoxylins because the time and they go probably a bluing agent. 00:23:03:19 – 00:23:33:00 And the issue I just want to replay this so we can see how those is. So the slides are supposed to be in that black holder there. So the slides will be in there and then it goes to the next one and that’s how it works. And this is really a good, good tool because then the time of all of every sample is uniform, is a time that is standardize. 00:23:33:02 – 00:24:00:16 So if we standardize the process of doing frozen sections, we will be able to identify exactly where in the process is perhaps something. And regarding a staining, I think I have a question before about hematoxylin should we filter or not? Also, if the solutions are not being useful or or use another frequent and I have a common to do besides there the common the normal common. 00:24:00:16 – 00:24:35:09 They say it depends how much you use it. If you don’t use it, then don’t change it. But I want to add something that I found out later with the years to begin with. Hematoxylin. It will interact with the oxygen in the atmosphere so it will process, it will suffer a oxidation process. And if you see that, if you don’t use the hematoxylin for longer than perhaps 8-12 hours, you’re going to see film on top of Hematoxylin and that at the time you place the slides are going to create artifact as well as staining artifact. 00:24:35:11 – 00:24:54:22 The other thing is that is the carryover. The carryover is also something that we need to keep in mind because every time we introduce the sample, the first one right in the water, or perhaps when the to the first station and then it goes to the next one, but it’s going to be debris in the sample itself remaining in hematoxylin. 00:24:54:24 – 00:25:20:12 And then at the time we go deep into issuing it, will all of this precipitate? It will go into the slide. So that’s, that’s one thing to consider. Second is like you have 95% alcohol, 100%, perhaps 100% will remain 100%. But the solution is going to definitely evaporate. So you need to add, you need to interact with the station even if you don’t use it at all. 00:25:20:14 – 00:25:46:00 And the other thing is the 95%, the alcohol will evaporate and you will have 95% at the end of the week. So you see if we try to look for something, we will standardize and we try to say, okay, you know what, the problem is not the staining, because the chart said that that the technician change, this is stains on Monday really just the every Monday. 00:25:46:02 – 00:26:08:18 So if we see something as a result, we can eliminate this because we said we all do the same thing. We all do the same the same amount of time. Right. Like one minute, 1.5 minutes in Hematoxylin we always use the 30 seconds and eosin And this is a standard procedure. No other lab is doing different time. 00:26:08:24 – 00:26:24:00 And that’s what we’re trying to work with and make this whole process as standardized so we can eliminate problems. 00:26:24:00 – 00:26:42:20 Okay. And just reiterate that the cutting and that’s the only time we’re really going to use the cutting in the for kidney transplant, liver transplant. It is for kidney. And when I say it’s trimming fat, that might be good. 00:26:42:20 – 00:27:10:15 The sample that is going to prevent to have good sections as well. So it’s not a small detail. It happens. So the next part will be the embedding. And we see the embedding using the 24 millimeter bar. And for embedding, we remember we had to be perfectly flat. The sample needs to be in the center. It needs to be surrounded by OCT because if it’s too close to the edge, we’re going to have problems picking up the sample. 00:27:10:17 – 00:27:40:22 And the way I try to work with this is a technique that I that I change the angle of the actually the block and I present the block on one of the corners of the block, one of the angles of the block. So it meets the blade. And increasingly, instead of meeting the blade in the flat part, which is going to the higher surface of resistance and getting the blade, I do it in a v-shape or fashion. 00:27:41:02 – 00:28:06:19 So the resistance will be gradually increasing. So it will be less vibration of the blade and less resistance and more natural cutting. Just the dimension. Something about embedding and then sectioning offers that in as well. We’ve got to add temperature. If it’s too cold the block or is still too warm and not cold enough yet we need to. 00:28:06:20 – 00:28:31:00 It offers the different problems, for instance, that might not look like this staining because it’s too dark and was a ways too dark. And we use an automatic scanner and the sample is going through the same time. And the answer is because the sample, the section is too thick, the thickness of the section, you can set up this five microns, for instance. 00:28:31:02 – 00:29:02:05 But it necessarily doesn’t mean that it’s a five micron. See, the block is too hot, it becomes too hard. It’s just like butter. It will cut thicker sections and the staining is going to be richer because of this. Layers of cells, one top of the other, and then the other stain, or maybe do not fit for the reading is not because the stain or part or you didn’t change the solutions or any of the reasons or you left the solution for so long because again it’s an automatic stain or is because the sample is actually thick. 00:29:02:07 – 00:29:23:03 Same thing goes to the other end when it’s too thin, when it’s too thin, for instance, you want to cut for three microns, the even that three microns you might have a bad quality of the nuclei and then you will have little holes in the nuclei because that three microns that’s that’s what happens. Besides the fact that is going to be very difficult for the person. 00:29:23:03 – 00:29:57:01 Cutting three microns, believe me, is really difficult. I cut kidneys at three microns and this is really challenging. Okay. And then we’re going to go to extremely important topic because many of these kidneys in general livers as well, that they are decided to be discarded. They are decided to be discarded based on the frozen section read. So the pre implant process of this organ is being decided. 00:29:57:01 – 00:30:32:14 The fate of these organs in this type with the frozen section read and the frozen section reading will have this this separate type of artifacts, artifacts, artificial products are by products of something that we can see their microscopes, the pathology you have in front of them, but they are not real at all. And this is just technique. And I want to, you know, kind of repeat as many times as I can, like just Dr. Peters used to tell the residents and myself everything is just the way you do it. 00:30:32:16 – 00:30:54:22 Your intention doesn’t count. You may have a good intention, but if you don’t follow this technique and you follow these steps and you control the temperature, you there are certain things you cannot control. Like, for instance, this picture that we see, this kidney. Kidney has definitely more water. And because of that, it will be exposed a little more to this freezing effect. 00:30:54:24 – 00:31:14:07 And you can see the kidney to the right and you can see the tubules. This is not a diagnostic purpose presentation, but we can see how shrink is the tubule into the right is really shrinking this halo of emptiness on the side obviously was it was because of the presence of water and the crystallization of water. 00:31:14:09 – 00:31:44:17 And believe me, this kidney is exactly the same kidney into the left. But we don’t see that anymore. As in this is technique. This is pure technique. Our residents that are coming every year is something some of them haven’t seen a cryostat in their lives. They’re rotating in many other parts of the hospital, but pathology sometimes is not the first one or the one that I go first. 00:31:44:19 – 00:32:06:05 But so they never seen a cryostat and believe me, in the first and second day they are doing beautiful frozen sections. Again, this is muscle memory is about listening to the block being cut. It is about looking. The section itself is even or has thick and thin areas. It’s about the temperature of the block. 00:32:06:07 – 00:32:33:07 So it is a lot of muscle memory. So this is a process that again, like I say, our residents are on duty really soon after they start and after hours they are the ones that are cutting the frozens by themselves. So they learn this really quick and with great results continue with this artifacts we have shattering we talk about that is a temperature and water content and the flexibility of the block. 00:32:33:09 – 00:33:08:20 They have a certain compression artifacts like a darker chromatic nuclear ice crystals, and we see this nuclear ice crystals more when the section is thinner, drying artifact. When we obtain the section, immediately that section, it’s five microns. And this section obviously it’s exposed to the draft of the room and to desiccation and that desiccation. It’s really bad because the passage of this dyes, you know, in contact with the tissue. 00:33:08:22 – 00:33:38:21 They are going to be they’re not going to interact well with the tissue. So if you see a hazy slide that you know is not well, this stain and it’s like it’s cloudy, it’s not just crispy and just yourself, you know what kind of artifact this is? Like this not just not there, but is there. So what happened is that this sample, perhaps it was left more than 5 to 8 seconds air drying before it’s placed in the fixative. 00:33:38:23 – 00:34:08:10 That’s what we proposed Some of the places are not doing. They were carrying the samples into the stain directly. But we propose in as Dr Peters elective to have it in fixative. It could be 95% or some proprietary that are in the market as well. That is a mix of formalin and very, very, very light. The concentration formalin in alcohol and immediately you take the section, the section, you pick up the section in this slide, you did that immediately. 00:34:08:12 – 00:34:30:15 And that prevents hundred percent the drying artifact. And obviously this pale haze staining on this slide. The venetian effect, I heard that venetian effect might be by a dull blade. But what’s going to happen to us? Because again, I said we change plates every day, every single patient. But the venetian effect, I’ve seen it more when there are moving parts. 00:34:30:15 – 00:34:53:24 So the cryostats have multiple moving parts. Obviously the machine moves, but we know that the stage also have differing angles that we can get out of it. We can move this space actually right to left. So there are multiple levers on the on the cryosat and the holder of the chalk as well. It has also an angle that we can change and modify. 00:34:54:01 – 00:35:19:04 So how come if we fix this the day before or maybe a few days now I have this venetian effect again and the presenter of this webinar told us that it’s because something is moving there. Well, remember, cryostats have cycles of defrosting and going back to the -20, 25 degrees, whatever your lab decided, we propose a set temperature so we all in the same page. 00:35:19:06 – 00:35:41:01 But regardless of that, they have cycles of thawing and freezing. Well, this is exactly the same principle of physics that expansion and contraction. And believe it or not, this part this levers are going to get loose from one day to the second day. So every day. But technicians should check these levels and make sure that all the non moving parts shouldn’t be moving. 00:35:41:03 – 00:36:09:18 Okay. And then we have a staining debris for like it was an equations about filtering hematoxylin and I already mentioned we had to definitely filter Hematoxylin as well because the staining debris is a carryover. It’s not like you filter once. Maybe the hematoxylin, but you don’t change that every day, but it’s still the carryover from the frozen section and previous, and especially in places where we have a lot of frozen sections, we have 15, 20 frozen sections at one sometimes definitely 00:36:09:18 – 00:36:47:04 We need to filter hematoxylin. Shattering, it is the perfect sample setting and the funny part is actually the curious part of that you see is the kidney to the right. You see a bunch of tubules and stuff and then you can see, you can see the shadowing that is to the left. And the reason is because this particular section of tissue has a normal kidney and a tumor, and the tumor perhaps has more water, content, edema, local edema, and the cells there have more water content and and the you can see the shattering and this breaking up because the nature of the tissue. 00:36:47:04 – 00:37:12:22 So it’s not uncommon but it can be fixed. Freezing artifact, this is a special because you can see a lot of freezing artifacts in the image. The right and then in the image to the left, you don’t see it. But the interesting part is that this is the same patient our pathologist CompuMed determined that, okay, this is freezing artifact and this is a good thing. 00:37:12:22 – 00:37:43:22 This is a good call because the pathologists it is definitely not interpretable and immediately go for a repeat and you can see we’re not going to tag these as microcytosis or anything triads or nothing. But we can see the difference between both and one with freezing artifact, one without freezing artifact. And again, the cryotomist was able to identify what was the problem. 00:37:43:22 – 00:38:34:23 Probably in this case is definitely a temperature warm up a little bit the block and the results are there and and yeah so this kidney I mean this this organ probably regardless of the fate of the organ we know our pathologist make the decision then and produce the diagnosis with certainty and confident that the slide prepared in the slide presented to this person of this our professional our pathologist is is a real it’s whatever the tissue represents with damage or without damage with a lot of certainty can say this tissue is good for read transplant, do or not. 00:38:35:00 – 00:39:08:15 So that’s why it’s extremely important OPOs to have the right frozen section and to follow the right techniques and to have results that are accurate and not to, and discarding an organ that otherwise will be of help. And even if a small percentage of these organs are are taking the safe from discard for the person who actually waiting on this line, it’s just, you know, very importantly very pertinent. 00:39:08:17 – 00:39:58:02 Finally, I want to talk about something that we were talking before and this continuous training, and this is what we propose for our OPOs to have this a standardized way to do this process and sections learn the techniques that are presented and that already been proven. For instance, this is our Padma, our supervisor Padma from STA. She is practicing as well and it is proven that the more the practice, the more people actually learn how to do this techniques and in the very easy is the way in in their own setting they will perform and then they will do excellent frozen sections and we can obtain optimal slides for the pathologist to read now 00:39:58:02 – 00:40:18:00 and also help us because in the event we don’t have optimal slide, well, we know in which part of the process what could be the problem is that the cutting of the sample, maybe we have to trim a little bit fat is of the embedding because he stood next to the board or maybe is not, you know, perfectly flat in bed. 00:40:18:01 – 00:40:46:09 It is at the time of sectioning the temperature or the blade, the angle moving parts, too much water, for instance. So we were able to identify which part of the process is we don’t even go to the to the remediation because we got it right at the beginning. That’s the beauty of using this system and learning the proper techniques. 00:40:46:11 – 00:41:17:00 We don’t have to repeat something that we already can do it very well so we can isolate. The problem is human, mechanical, so we’re digital, so we’re related. Okay, I have another question. I think we’re running out of time. Sorry. Right. And the use of tele pathology, digital imaging is a whole different chapter. It’s been there for a while. 00:41:17:02 – 00:41:49:22 Aperio microscope with Leica using image analysis. Then we have the one we use. The one we use at CompuMed is the you can see how portable it is and you can take this a scanner and the software is actually amazing the use into and to bring this frozen section remotely. Their brands like Motic and Morphle also are in the business of digital imaging. 00:41:49:24 – 00:42:15:09 We’re not the only ones that radiology also uses that as well where our different ways but we need to scan for the slides, that’s for sure. And it also presents challenges as well, because this machine is just software and they have connections with our networks. Right and they have servers. So that also creates some this small chapter of of troubleshooting as well. 00:42:15:11 – 00:42:52:09 But as long as a person who has the right training, they can identify exactly what is the problem and remediate the issue. Okay. And lastly, the QC at CompuMed we always achieve for the best results. And we have developed a organized way to do our quality control about the sample size, the volume. That’s the first thing when we receive one core two cores, which a, what is the size of the wedge is this is point three. 00:42:52:13 – 00:43:24:10 Point five is still had to be documented because believe it or not, even in retrospective or prospective studies, this is extremely relevant. Some people are advocates of core biopsies, some people are advocates of wedge biopsies. Some of the people advocate for both or in which, because they have different advantages and disadvantages regarding a core, might go linearly into the parenchyma of the tissue, right, while of which might have a chunk. 00:43:24:10 – 00:43:51:09 But hemostasis. This is a problem when you have a chunk of tissue out, even if it’s a small. So it has a different challenges. And good thing is that a lot of people is paying attention to this sample size and they are actually creating studies to find out if statistically and in a formal way what is ideal. And this is what it’s about medicine. 00:43:51:11 – 00:44:18:01 You’re always being curious and finding the best way to do things for the benefit of the patients. So our patients, it’s like fixation. I said, you know, when we obtain dissection section immediately. But I said immediately, it need to be deep into this fixation in order to prevent desiccation and avoid this drying artifact. This is especially important when we do touch preps and then embedding cryotomy. 00:44:18:01 – 00:44:38:21 I think we went through already about that and we went to know and when we do this, they say we see we have shattering effect we have shatter and we have freezing artifact that we have venetian effect, then we identify, you know, if we’re doing it right or wrong, human machine, preventive maintenance of equipment, we would talk about that. 00:44:38:21 – 00:45:05:06 But it’s extremely important to have preventive maintenance of any equipment and document that as well. A staining change in the stains that even if done and use. You see why we had to change this the stains and later Lastly of the digital pathology scan that we really discuss when what comes here. Right. Okay. Well thank you. I think so. 00:45:05:06 – 00:45:28:17 Laura Carroll Fernando, I’m going to jump in on a couple of questions that were posted during the webinar. Thank you. It’s just so, so helpful. Earlier when you were talking about the actual freezing part. So there’s a couple questions that are tied together. One of them is, is can we dab the water off of the specimen to avoid freezing artifacts? 00:45:28:19 – 00:45:58:07 And she also shared also asked us, do you filter the excuse me, the hematoxylin every day. Okay. So, so so every tissue like in there has different contents of water within it with kidney. And we’re dealing with with liver. But how it perhaps this might be a small detail, but it’s extremely important how the sample actually reach the lab is it in saline solution. 00:45:58:09 – 00:46:26:14 Fernando Chang IMG Well, there’s a lot of water there and then then that’s not ideal or is in a telfa pad and is therefore telfa pad is moist. So to prevent desiccation of the tissue as well. And that’s obviously ideal. But even those small details make a huge difference. Now regarding a how to well every tissue cause with the water content that is related to previous factors, if this is a kidney obviously is going to have water content because that’s what the kidney. 00:46:26:14 – 00:46:54:09 That’s right. And this gives me a filtering and and then we cannot really control that. Taking water out of the tissue. Perhaps livers come with less less water content. But it depends on the tissue. And there is no way to extract the water out of the tissue that otherwise we will be completely, you know, altering the architecture of the tissue. 00:46:54:11 – 00:47:25:06 But how it is received, it’s important in filtering my thoughts and definitely, yes, I think this this one may cover couple others here too is from like how long how long would it take a coordinator to become competent at this, in your opinion? I would say with first we have a small theory introduction. Is the theory theoretical facts have got to be important for the person to understand what it is doing. 00:47:25:08 – 00:47:55:06 You cannot do anything if you don’t understand what are you doing. And this is just basic basics. The basics of the basics about observation, I would say. And, and like we think before with STA in three days that we work with the technicians and then we reinforce that with with them they able to cut frozen sections, you know and more consistently basis and doing better work. 00:47:55:08 – 00:48:20:17 So I would say it’s much quicker than people would think. absolutely. Yes, yes, yes. Okay. And we can share more of that. There’s some other questions in here, too. They’re coming in fast and furious at the end. One of them is, is is what do you think would be kind of an estimated cost of the slide stainer that you had shown in the presentation? 00:48:21:17 – 00:48:48:20 this Stainer, I would say maybe are around ten K to 15 K I’m not completely sure where that will. I know it will be around 30 to 40 K, but the nearest stainer I will calculate there will be around 1520 K even though there’s no one this another one, the fisher one. I know the Fisher is like a5k, It’s a little more simple than the other one because it’s more like a conveyor. 00:48:48:22 – 00:49:09:05 And the fisher is that it’s around five K, but the other one has a station, has a panel that is kind of it has probably a computer chip or something like that that is kind of more sophisticated with a staging area probably that will be around 10k. So it’s a big range based on what you’re getting. 00:49:09:07 – 00:49:44:19 Same thing. Okay. And then what do you think? What are the questions here is when doing H&E of samples other than kidney and liver samples, are there any staining techniques that are needed, different staining techniques. I know that’s probably a loaded question and we have limited time, so. Well, be quick. That is also used especially for lymph, for proliferative disease, let’s say for for touch, perhaps, for instance, that it quickest, which is very common to use, it really stands out the lymphocytes. 00:49:44:21 – 00:50:11:05 but the H&E is the standard. I don’t really work with anything different through the years and through the places. So then H&E and again the dif quick will be for touch preps and in principle proliferative diseases states really. Well the, the lymphocytes. Okay. And then on here there was a and I think this ties into a couple other questions. 00:50:11:05 – 00:50:38:18 In general the I mean we cannot read it about the stains on a weekly basis that that they’re changed and kind of what is your guideline on that and I think you address that earlier. But if you want to reemphasize that, yes, I will do that because again, I said the carryover is the carryover. Second is evaporation of and then the precipitation and then the formation of film, especially in Hematoxylin Hematoxylin tend to oxidize. 00:50:38:20 – 00:51:01:23 You know, if that if you are obviously not, if you have a pure is immediately you open the container but you can see the results of this oxidation maybe within 12 to 48, 12 to 24 hours, and you’ll see a film on top of the hematoxylin. And that’s also a problem because is when you dip the slide to a stain, it will be on the slide. 00:51:02:00 – 00:51:31:17 Okay. And here’s one that came in during the presentation is when a slide does not have a significant number of glomeruli or like is that an issue with the sample size or cutting technique? Well, that’s that’s basically set up for what we can obtain. And again, 25 is the gold standard for kidneys and obviously 25 it will be in a really small fragment of tissue. 00:51:31:19 – 00:52:09:08 So I don’t think less than 25 Glomeruli will guarantee a good rating unless you find five or six glomeruli that are so sick. And so you know, not happy looking that perhaps with that you can say, well, this is, you know, different than when entering diagnosis or anything like that. But the goal is ten tender is is 25 primary line and and I guess I wedge is it’s always ideal because you can see you can see more in that you can see interstitial you can see glomerular, you can see blood vessels, you can see tubules a lot. 00:52:09:08 – 00:52:29:02 And then and we will give you a better picture of that. But if we see something that is really critical in two or three glomeruli or perhaps this is all over the place as well, some can see we’re I’m told and I notice there’s a couple on here and I just want to reiterate about the regulatory and the OSHA complement. 00:52:29:02 – 00:52:56:21 And then, Fernando, we’re not really qualified to address regulatory So I just want whoever submitted those. I wanted to let you know that we worked, but I just want to mention something really short about that. We all is still under the umbrella of OSHA, for instance, and, and in the setting of lapse, we still had to follow biohazard ready PPE, use of PPE, and many other things that are common to any surgery center. 00:52:57:02 – 00:53:25:08 And that’s under the OSHA umbrella And that’s something that’s that’s helpful. Just yes, that part of it. So one other question is, is so are you, Fernando, available to to train at the DCU units and to help? That’s okay. Absolutely. That will be that will be something really good. I’m looking forward to work with them. Every time I go for a training, I learn new things. 00:53:25:10 – 00:53:48:18 And this is the beauty of teaching. And at the same time it’s learning as well. This a constant process and I will be honored and thrilled to do that. I’m going to sneak one more in that just came in while preparing multiple slides at once what’s the best practice to store the slide in formalin while waiting to stain. 00:53:48:20 – 00:54:31:19 okay. So you have multiple frozen’s, let’s say, and you have them and you’re cutting out. You know, when you have multiple frozen is usually we have it an a break and then we have them in in the fixative until we are ready to stain. It is really no difference, especially if you have a bunch of people cutting like two or three person cutting then, then you can I for that question that is related to that because we don’t keep the this the ones you obtain the section immediately had to be a go to the Stainer unless you have multiple and then you keep cutting and then you stain everything up once. 00:54:31:21 – 00:55:01:12 So thank you. We’re going to go ahead and wrap up to keep this on time. And we are absolutely thrilled with everybody who joined us today. The video recording will be available later and we are going to have more in the series of Fernando and his expertise to share with all of the transplant, the organ community. And again, we really think everyone for joining us and feel free to reach out to us with more questions and we will follow up on those. 00:55:01:12 – 00:55:02:17 So thank you again.
Video Summary
  • Standard of Care
  • Pathology Lab Setup
  • Equipment Requirements
  • Frozen Section Flat Embedding System
  • Technique: Biopsy Sample Preparation
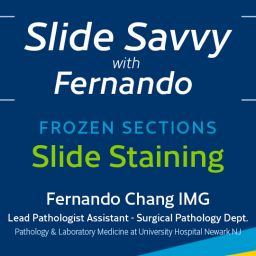
  • Staining
  • Troubleshooting
  • QC
  • Step-by-step Procedure
  • Importance of Continuous Training
  • Compliance and Accreditations
  • Use of telePathology
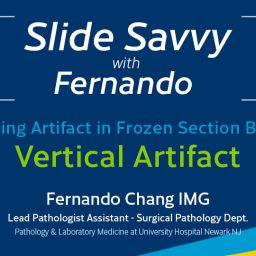
Fernando Chang IMG

Lead Pathologist Assistant - Surgical Pathology Department
Pathology and Laboratory Medicine at University Hospital Newark NJ
Rutgers Medical School
Summit Health
Atlantic Health Care System
RWJ Barnabas Healthcare system
Saint Peters Healthcare System

Drawing from methodologies pioneered by the late Dr. Stephen Peters, Fernando collaborates with the Rutgers NJMS Pathology Residency program main surgical pathology and autopsy rotation at University Hospital. Here, he imparts innovative techniques in Anatomic Pathology Rotation, Frozen Sections, and the utilization of Telepathology Aperio Scan Scope. With more than 17 years of experience, Fernando has a wealth of expertise in working closely with OPOs.

Related Posts

Compumed News & Updates for Organ Donation/Transplant

* indicates required
What notifications would you like?
 
Privacy Preferences
When you visit our website, it may store information through your browser from specific services, usually in form of cookies. Here you can change your privacy preferences. Please note that blocking some types of cookies may impact your experience on our website and the services we offer.